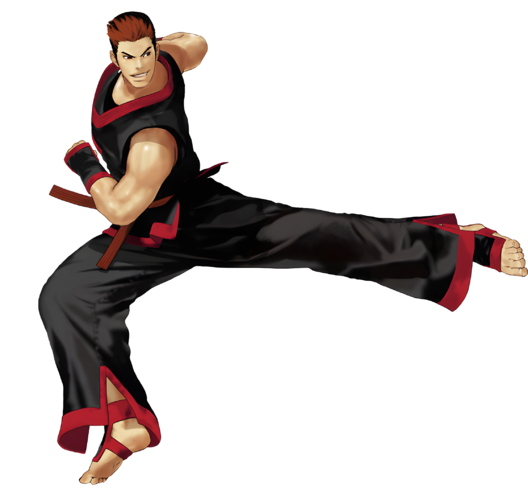
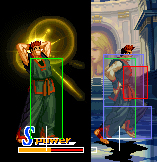
Introduction
To come.
Gameplay
To come.
| Strengths | Weaknesses |
|---|---|
|
|
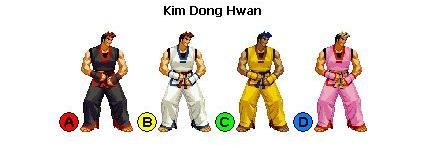
Character Colors
Move List
Frame Data Source : http://www13.atwiki.jp/garoumow/pages/21.html and https://w.atwiki.jp/garoumow/pages/72.html
| Data Help | |
|---|---|
| Disclaimer: This is meant to teach basic terminology used when describing moves. | |
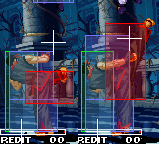
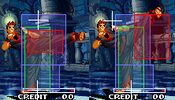
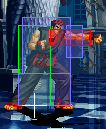
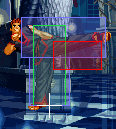
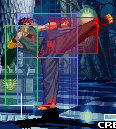
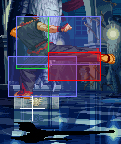
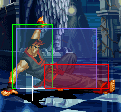
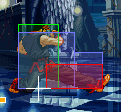
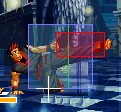
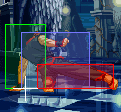
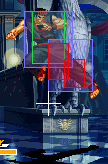
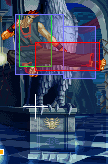
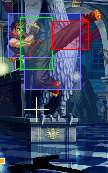
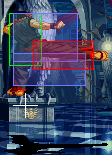
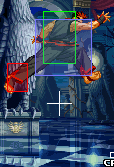
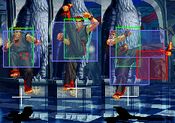
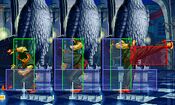
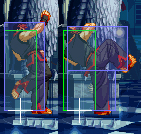
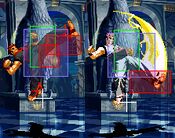
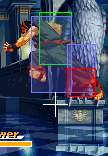
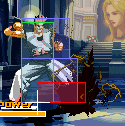
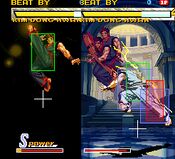
| HitBox: | A predefined area (usually a group of rectangles or circles) that tell the game how any given attack can come in contact with a character. Hitboxes are invisible to the player when normally playing. |
| HurtBox: | A predefined area (usually a group of rectangles or circles) that tell the game how your character is allowed to get hit by any incoming attack. Specifically, you'll get hit by (or block) an attack if that attack's hitbox ever overlaps your hurtbox. |
| Throw Box/Range: | Active throw frames and range. Your opponent will be thrown in this field if not in block or hit stun. |
| Projectile Box: | Hit box on a projectile attack. |
| Guard/Counter Box: | The Guard Box or Counter Box. This appears when blocking or using a counter move. |
| Push Box: | Has no bearing on hurt/hit boxes. Just allows characters to not pass through each other. (Also known as "Collision Box".) |
| Command | the input for the attack. |
| Start Up | The number of frames that initiate at the beginning of an attack after the input.
And when the first hitbox is present.
The first active frame is after the last startup frame. |
| Guard | The way this move must be blocked.
High or H or Overhead (especially when from the ground) -- must be blocked standing. |
| Damage | "basic" damage -- unmodified damage values
"correct" damage -- damage values modified for damage scaling, TOP multiplier, and defense rate |
| Guard Crush Value | Decrease your guard durability gauge/meter by that value/s |
| + | signifies how many advantage frames the attacker has. |
| - | signifies how many disadvantage frames the attacker has. |
| KD | means the attack will knock the opponent down. |
| ◯ | circle means cancelable on both hit/block. |
| ∞ | infinity means chain cancelable with the same button (renda cancel). |
| ※ | means cancelable on the first hit/part only. |
| 《 》OR « » OR << >> OR ( ) | The numbers in the brackets are the startup frames until the next stage (the gap until the next hit's first active frame). |
| △ | up triangle means only cancelable on block. |
| ▽ | down triangle means only cancelable on hit. |
| × OR X | means not cancelable. |
Notes:
- Special/Super moves with "Guard" data in red text are impossible to just defend at 0-pixel health bar.
- For P-Power Raimei Dan 236(x2)D, the last hit, for every level, is impossible to just defend at 0-pixel health bar.
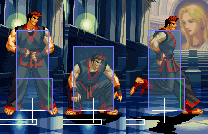
| Standing, Crouching and Running | Taunt | Jumping (35 total frames) |
 |
 |

|
Super Jump: Press ![]() , then
, then ![]() /
/![]() /
/![]() Dong cannot JD during a superjump, allowing opponents to anti air
Dong cannot JD during a superjump, allowing opponents to anti air
Wall Jump: Jump towards a wall and then press the opposite direction to it. Dong retains his air JD ability after wall jump. It is a good tool to escape the corner.
Close Standing Normals
Close 5A
| Damage | Guard | Startup | Active | Recovery | Total |
|---|---|---|---|---|---|
| 4 | Mid | 3 | 4 | 5 | 12 |
| Hit Adv | Block Adv | Feint Cancel | Cancel on Hit | Cancel on Block | Guard Crush Value |
| +6 | +6 | ◯ | ◯ / ∞ | ◯ / ∞ | 4 |
|
Standing jab. | |||||
Close 5B
| Damage | Guard | Startup | Active | Recovery | Total |
|---|---|---|---|---|---|
| 6 | Mid | 4 | 4 | 7 | 15 |
| Hit Adv | Block Adv | Feint Cancel | Cancel on Hit | Cancel on Block | Guard Crush Value |
| +4 | +4 | ◯ | ◯ | ◯ | 4 |
Close 5C
| Damage | Guard | Startup | Active | Recovery | Total |
|---|---|---|---|---|---|
| 6, 6 | Mid | 5 | 1, 4 | 22 | 32 |
| Hit Adv | Block Adv | Feint Cancel | Cancel on Hit | Cancel on Block | Guard Crush Value |
| -5 | -5 | ※ | ※ | ※ | 3, 3 |
|
It can anti-air jump startups when trying to throw, is double hit and you can feint cancel it to get a combo. | |||||
Close 5D
| Damage | Guard | Startup | Active | Recovery | Total |
|---|---|---|---|---|---|
| 6, 6 | Mid | 4 | 1, 《5》, 3 | 24 | 37 |
| Hit Adv | Block Adv | Feint Cancel | Cancel on Hit | Cancel on Block | Guard Crush Value |
| -6 | -6 | ※ | ※ | ※ | 3, 3 |
Far Standing Normals
Far 5A
| Damage | Guard | Startup | Active | Recovery | Total |
|---|---|---|---|---|---|
| 5 | Mid | 3 | 4 | 5 | 12 |
| Hit Adv | Block Adv | Feint Cancel | Cancel on Hit | Cancel on Block | Guard Crush Value |
| +6 | +6 | ◯ | ◯ / ∞ | ◯ / ∞ | 4 |
Far 5B
| Damage | Guard | Startup | Active | Recovery | Total |
|---|---|---|---|---|---|
| 7 | Mid | 4 | 3 | 12 | 19 |
| Hit Adv | Block Adv | Feint Cancel | Cancel on Hit | Cancel on Block | Guard Crush Value |
| 0 | 0 | ◯ | ◯ | ◯ | 4 |
Far 5C
| Damage | Guard | Startup | Active | Recovery | Total |
|---|---|---|---|---|---|
| 14 | Mid | 12 | 3 | 28 | 43 |
| Hit Adv | Block Adv | Feint Cancel | Cancel on Hit | Cancel on Block | Guard Crush Value |
| -10 | -10 | △ | X | ◯ | 5 |
Far 5D
| Damage | Guard | Startup | Active | Recovery | Total |
|---|---|---|---|---|---|
| 14 | Mid | 13 | 2 | 20 | 35 |
| Hit Adv | Block Adv | Feint Cancel | Cancel on Hit | Cancel on Block | Guard Crush Value |
| -1 | -1 | X | X | X | 5 |
|
Note: It's possible to reduce the move's overall recovery by canceling its landing recovery. | |||||
Crouching Normals
2A
| Damage | Guard | Startup | Active | Recovery | Total |
|---|---|---|---|---|---|
| 4 | Low | 5 | 4 | 9 | 18 |
| Hit Adv | Block Adv | Feint Cancel | Cancel on Hit | Cancel on Block | Guard Crush Value |
| +2 | +2 | X | X / ∞ | X / ∞ | 4 |
2B
| Damage | Guard | Startup | Active | Recovery | Total |
|---|---|---|---|---|---|
| 6 | Low | 4 | 4 | 5 | 13 |
| Hit Adv | Block Adv | Feint Cancel | Cancel on Hit | Cancel on Block | Guard Crush Value |
| +6 | +6 | ◯ | ◯ / ∞ | ◯ / ∞ | 4 |
2C
| Damage | Guard | Startup | Active | Recovery | Total |
|---|---|---|---|---|---|
| 10 | Mid | 5 | 3 | 14 | 22 |
| Hit Adv | Block Adv | Feint Cancel | Cancel on Hit | Cancel on Block | Guard Crush Value |
| +4 | +4 | ◯ | ◯ | ◯ | 5 |
2D
| Damage | Guard | Startup | Active | Recovery | Total |
|---|---|---|---|---|---|
| 10 | Low | 7 | 4 | 25 | 36 |
| Hit Adv | Block Adv | Feint Cancel | Cancel on Hit | Cancel on Block | Guard Crush Value |
| KD | -8 | X | X | X | 5 |
|
One of the best sweep in the game. Can be punished with supers or when not spaced properly. | |||||
Jumping Normals
jA
| Damage | Guard | Startup | Active | Recovery | Total |
|---|---|---|---|---|---|
| 5 | High | 5 | 7 | - | - |
| Hit Adv | Block Adv | Feint Cancel | Cancel on Hit | Cancel on Block | Guard Crush Value |
| - | - | - | ◯ | ◯ | 4 |
|
Can beat out upper-body evasion attacks, and can crossup | |||||
jB
| Damage | Guard | Startup | Active | Recovery | Total |
|---|---|---|---|---|---|
| 6 | High | 6 | 10 | - | - |
| Hit Adv | Block Adv | Feint Cancel | Cancel on Hit | Cancel on Block | Guard Crush Value |
| - | - | - | ◯ | ◯ | 4 |
jC
| Damage | Guard | Startup | Active | Recovery | Total |
|---|---|---|---|---|---|
| 9 | High | 6 | 5 | - | - |
| Hit Adv | Block Adv | Feint Cancel | Cancel on Hit | Cancel on Block | Guard Crush Value |
| - | - | - | ◯ | ◯ | 5 |
jD
| Damage | Guard | Startup | Active | Recovery | Total |
|---|---|---|---|---|---|
| 9 | High | 8 | 6 | - | - |
| Hit Adv | Block Adv | Feint Cancel | Cancel on Hit | Cancel on Block | Guard Crush Value |
| - | - | - | ◯ | ◯ | 5 |
Command Normals
j4C
| Damage | Guard | Startup | Active | Recovery | Total |
|---|---|---|---|---|---|
| 10 | High | 4 | 6 | - | - |
| Hit Adv | Block Adv | Feint Cancel | Cancel on Hit | Cancel on Block | Guard Crush Value |
| - | - | - | ◯ | ◯ | 9 |
|
Can beat out upper-body evasion attacks. | |||||
Universal Moves
Lower-body Evasion Attack (5AB)
| Damage | Guard | Startup | Active | Recovery | Total |
|---|---|---|---|---|---|
| 10 | Overhead | 25 | 1 | 19 | 45 |
| Hit Adv | Block Adv | Feint Cancel | Cancel on Hit | Cancel on Block | Guard Crush Value |
| -1 | +5 | X | X | X | 6 |
| |||||
Upper-body Evasion Attack (2AB)
| Damage | Guard | Startup | Active | Recovery | Total |
|---|---|---|---|---|---|
| 10 | Mid | 10 | 2 | 19 | 31 |
| Hit Adv | Block Adv | Feint Cancel | Cancel on Hit | Cancel on Block | Guard Crush Value |
| -2 | +4 | ▽ | ◯ | X | 6 |
|
1~5F upper-body invincibility. | |||||
T.O.P. Attack (5CD)
| Damage | Guard | Startup | Active | Recovery | Total |
|---|---|---|---|---|---|
| 10, 3×4 (base damage) | Mid | 8 | - | - | - |
| Hit Adv | Block Adv | Feint Cancel | Cancel on Hit | Cancel on Block | Guard Crush Value |
| KD | -9 | - | - | - | 2, 3×4 |
Throws
Ground Throw
| Damage | Guard | Startup | Active | Recovery | Total |
|---|---|---|---|---|---|
| 14 | - | 1 | - | - | - |
| Hit Adv | Block Adv | Feint Cancel | Cancel on Hit | Cancel on Block | Guard Crush Value |
| +34 | - | - | - | - | - |
|
Normal throw. | |||||
Air Throw
| Damage | Guard | Startup | Active | Recovery | Total |
|---|---|---|---|---|---|
| 16 | - | 1 | - | - | - |
| Hit Adv | Block Adv | Feint Cancel | Cancel on Hit | Cancel on Block | Guard Crush Value |
| +40 | - | - | - | - | - |
|
Air throw. | |||||
Feints
Forward Feint (6AC)
| Damage | Guard | Startup | Active | Recovery | Total |
|---|---|---|---|---|---|
| - | - | - | - | - | 10 |
| Hit Adv | Block Adv | Feint Cancel | Cancel on Hit | Cancel on Block | Guard Crush Value |
| - | - | - | - | - | - |
|
Mimics the start of Shiden-kyaku B (front stomp). | |||||
Down Feint (2AC)
| Damage | Guard | Startup | Active | Recovery | Total |
|---|---|---|---|---|---|
| - | - | - | - | - | 10 |
| Hit Adv | Block Adv | Feint Cancel | Cancel on Hit | Cancel on Block | Guard Crush Value |
| - | - | - | - | - | - |
|
Mimics the start of Shiden-kyaku D (back stomp). Try to use this feint for Dong, it has less pushback. | |||||
Special Moves
Raimei Zan (214K)
| B | Damage | Guard | Startup | Active | Recovery | Total |
|---|---|---|---|---|---|---|
| 10, 10 | Overhead | 19 | - | - | - | |
| Hit Adv | Block Adv | Feint Cancel | Cancel on Hit | Cancel on Block | Guard Crush Value | |
| -1 | -1 | - | - | - | 3, 3 | |
| D | Damage | Guard | Startup | Active | Recovery | Total |
| 12, 12 | Overhead | 25 | - | - | - | |
| Hit Adv | Block Adv | Feint Cancel | Cancel on Hit | Cancel on Block | Guard Crush Value | |
| -2 | -2 | - | - | - | 4, 4 |
Hishou Kyaku (j2K)
| B | Damage | Guard | Startup | Active | Recovery | Total |
|---|---|---|---|---|---|---|
| 10, 5×3 | Mid | 7 | - | - | - | |
| Hit Adv | Block Adv | Feint Cancel | Cancel on Hit | Cancel on Block | Guard Crush Value | |
| 0 or more (up to -4) | 0 or more (up to -4) | - | - | - | 2×4 | |
|
B version travels slower. | ||||||
| D | Damage | Guard | Startup | Active | Recovery | Total |
| 10, 5×3 | Mid | 9 | - | - | - | |
| Hit Adv | Block Adv | Feint Cancel | Cancel on Hit | Cancel on Block | Guard Crush Value | |
| 0 or more (up to -4) | 0 or more (up to -4) | - | - | - | 2×4 | |
|
D version travels faster, such that there are usually 3 hits, rather than 4 hits. | ||||||
Shiden Kyaku (236K)
| B | Damage | Guard | Startup | Active | Recovery | Total |
|---|---|---|---|---|---|---|
| 10 | Low | 22 | - | - | - | |
| Hit Adv | Block Adv | Feint Cancel | Cancel on Hit | Cancel on Block | Guard Crush Value | |
| +13 | +13 | - | - | - | 7 | |
| D | Damage | Guard | Startup | Active | Recovery | Total |
| 12 | Low | 25 | - | - | - | |
| Hit Adv | Block Adv | Feint Cancel | Cancel on Hit | Cancel on Block | Guard Crush Value | |
| KD | +9 | - | - | - | 8 |
Ashi Binta (63214C)
| C | Damage | Guard | Startup | Active | Recovery | Total |
|---|---|---|---|---|---|---|
| 5×6, 8 | Mid | 7 | - | - | - | |
| Hit Adv | Block Adv | Feint Cancel | Cancel on Hit | Cancel on Block | Guard Crush Value | |
| KD | -9 | - | - | - | 1×7 |
Kuu Sa Jin (623P)
| A | Damage | Guard | Startup | Active | Recovery | Total |
|---|---|---|---|---|---|---|
| 5, 6×3 | Mid | 4 | - | - | - | |
| Hit Adv | Block Adv | Feint Cancel | Cancel on Hit | Cancel on Block | Guard Crush Value | |
| KD | -30 | - | - | - | 3, 2×3 | |
|
1~5F full-body invincibility | ||||||
| A Break | Damage | Guard | Startup | Active | Recovery | Total |
| 5 | Mid | 4 | - | - | - | |
| Hit Adv | Block Adv | Feint Cancel | Cancel on Hit | Cancel on Block | Guard Crush Value | |
| KD | -6 | - | - | - | 3 | |
| C | Damage | Guard | Startup | Active | Recovery | Total |
| 8, 4×4, 8 | Mid | 4 | - | - | - | |
| Hit Adv | Block Adv | Feint Cancel | Cancel on Hit | Cancel on Block | Guard Crush Value | |
| KD | -29 | - | - | - | 3, 2×4, 5 | |
|
1~5F full-body invincibility | ||||||
| C Break | Damage | Guard | Startup | Active | Recovery | Total |
| 8 | Mid | 4 | - | - | - | |
| Hit Adv | Block Adv | Feint Cancel | Cancel on Hit | Cancel on Block | Guard Crush Value | |
| KD | -6 | - | - | - | 3 | |
Super Moves
Super Dong Hwan Kyaku (j236236P)
| A | Damage | Guard | Startup | Active | Recovery | Total |
|---|---|---|---|---|---|---|
| 15, 5×5 | Mid | 0 | - | - | - | |
| Hit Adv | Block Adv | Feint Cancel | Cancel on Hit | Cancel on Block | Guard Crush Value | |
| KD | -39 | - | - | - | 5×6 | |
| C | Damage | Guard | Startup | Active | Recovery | Total |
| 18, 6×6, 18 | Mid | 0 | - | - | - | |
| Hit Adv | Block Adv | Feint Cancel | Cancel on Hit | Cancel on Block | Guard Crush Value | |
| KD | -69 | - | - | - | 10, 7×7 |
Raimei Dan (236236K)
| B | Damage | Guard | Startup | Active | Recovery | Total |
|---|---|---|---|---|---|---|
| 35 | Mid | 19 | - | - | - | |
| Hit Adv | Block Adv | Feint Cancel | Cancel on Hit | Cancel on Block | Guard Crush Value | |
| KD | -5 | - | - | - | 20 | |
|
1~13F full-body invincibility. Has a projectile hitbox/hurtbox. | ||||||
| D Lvl.1 | Damage | Guard | Startup | Active | Recovery | Total |
| 6, 35 | Overhead, Mid | 17 | - | - | - | |
| Hit Adv | Block Adv | Feint Cancel | Cancel on Hit | Cancel on Block | Guard Crush Value | |
| KD | +5 | - | - | - | 10, 30 | |
|
The level (the number of hits) of Raimei Dan D increases according to the charging time (holding D). Lv 1 done without holding D, or D let go within 1~13F after exiting blackout. | ||||||
| D Lvl.2 | Damage | Guard | Startup | Active | Recovery | Total |
| 6, 8, 35 | Overhead, Overhead, Mid | - | - | - | - | |
| Hit Adv | Block Adv | Feint Cancel | Cancel on Hit | Cancel on Block | Guard Crush Value | |
| KD | +5 | - | - | - | 10, 10, 30 | |
|
Lv 2 done holding D for a moment, within 14~18F after exiting blackout. | ||||||
| D Lvl.3 | Damage | Guard | Startup | Active | Recovery | Total |
| 6, 8, 9, 35 | Overhead, Overhead, Overhead, Mid | - | - | - | - | |
| Hit Adv | Block Adv | Feint Cancel | Cancel on Hit | Cancel on Block | Guard Crush Value | |
| KD | +5 | - | - | - | 10, 10, 20, 30 | |
|
Max Lv 3 done holding D even longer, from 19~23F after exiting blackout. | ||||||
Ore-sama Houou Kyaku (236236236C)
| C | Damage | Guard | Startup | Active | Recovery | Total |
|---|---|---|---|---|---|---|
| 9, 4×7, 3×3, 9×5 | Mid | 0 | - | - | - | |
| Hit Adv | Block Adv | Feint Cancel | Cancel on Hit | Cancel on Block | Guard Crush Value | |
| KD | -10 | - | - | - | 20 | |
|
1F full-body invincibility. | ||||||
