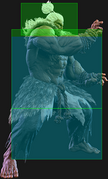
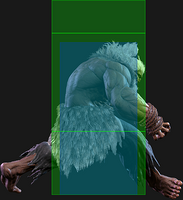
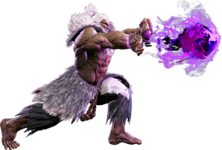
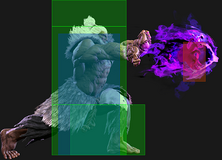
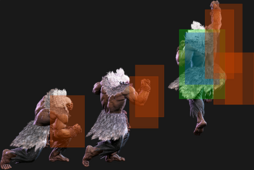
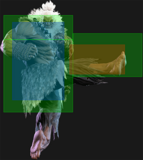
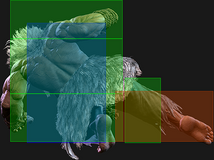
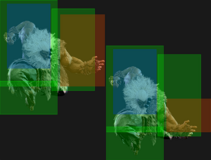
| Line 830: | Line 830: | ||
| title = (feint) | | title = (feint) | ||
| subtitle = | | subtitle = | ||
| input = 236K~ | | input = 236K~[2] | ||
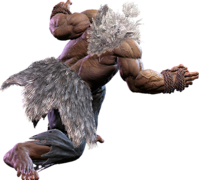
| images = | | images = | ||
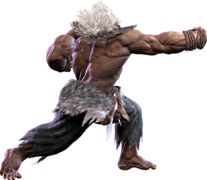
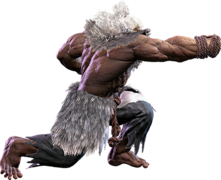
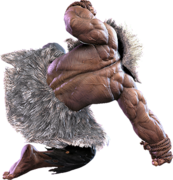
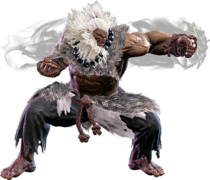
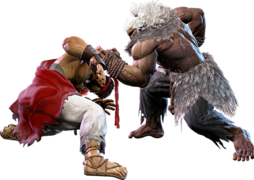
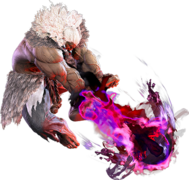
{{MoveDataCargoImage|imageHeight=150px| | {{MoveDataCargoImage|imageHeight=150px|akuma_236k_2_hold|caption=}} | ||
---- | ---- | ||
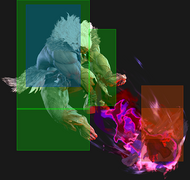
{{MoveDataCargoImage|imageHeight=140px| | {{MoveDataCargoImage|imageHeight=140px|akuma_236kk_2_hold|caption=}} | ||
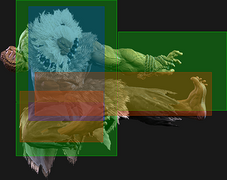
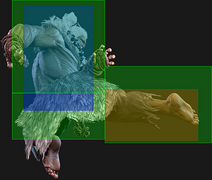
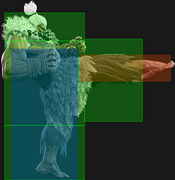
| hitboxes = | | hitboxes = | ||
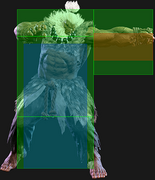
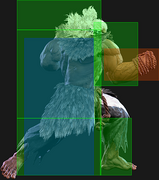
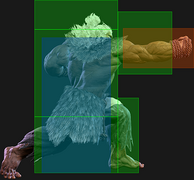
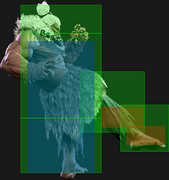
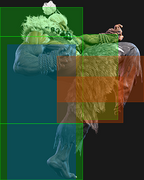
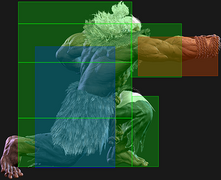
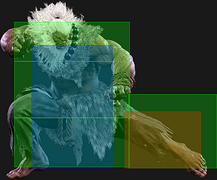
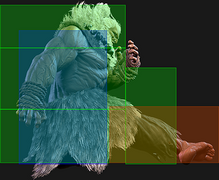
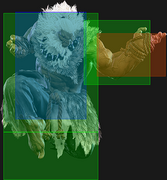
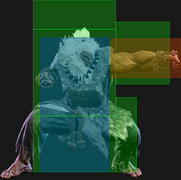
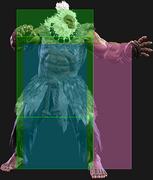
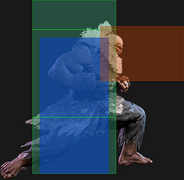
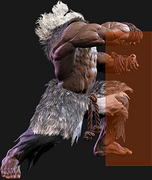
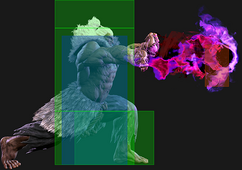
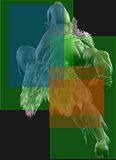
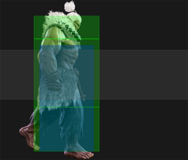
{{MoveDataCargoImage|hitbox=yes|imageHeight=160px| | {{MoveDataCargoImage|hitbox=yes|imageHeight=160px|akuma_236k_2_hold|caption=}} | ||
---- | ---- | ||
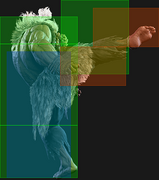
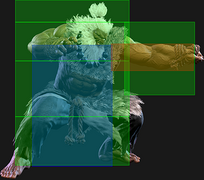
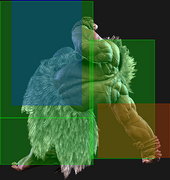
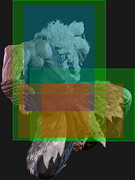
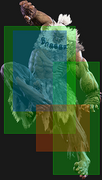
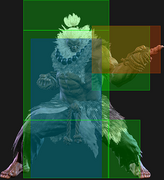
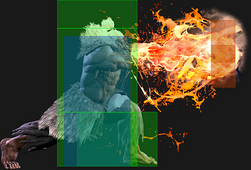
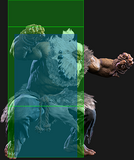
{{MoveDataCargoImage|hitbox=yes|imageHeight=170px| | {{MoveDataCargoImage|hitbox=yes|imageHeight=170px|akuma_236kk_2_hold|caption=}} | ||
| info = | | info = | ||
{{AttackDataCargo-SF6/Query| | {{AttackDataCargo-SF6/Query|akuma_236k_2_hold}} | ||
{{AttackDataCargo-SF6/Query| | {{AttackDataCargo-SF6/Query|akuma_236kk_2_hold}} | ||
<br> | <br> | ||
Revision as of 19:45, 3 May 2024
| Early game information
This game is relatively new, and its pages are still being written. Some information may be mildly inaccurate or missing altogether. You can join the SF6 Resource Hub for more info on editing and other ways you can potentially help with this resource. |
Introduction
A demon of combat that has welcomed the Satsui no Hado into his being in his quest to become the ultimate master of the fist.
Akuma has an incredibly versatile toolkit, with strong, far-reaching normals and a high walkspeed to control space, multiple projectiles to force or shield an approach, and incredible corner carry to force his foes into the most dangerous of situations. He's especially good at maintaining his advantageous positions, with certain knockdowns leading to a potentially rewarding vortex that can loop back into itself. All this is counterbalanced by his lower health, a massive drawback that makes each mistake that much more costly and forces him to use each tool in his arsenal wisely to avoid inviting his own destruction.
While Akuma has the traditional shoto toolkit (fireball, DP, tatsu, shoto normals), he puts his own dark spin on them, encouraging peerless aggression. His Gou Hadoken has three vastly different speeds it can be fired at, and can be charged for additional hits. His fireball also has a unique air version called Zanku Hadoken, which can be used to counter DP attempts or set up for continued pressure. His Gou Shoryuken acts as a great combo ender and anti-air, with an OD version that leaves opponents close on hit. His Tatsumaki Zanku-kyaku goes through fireballs like Ryu's, but the heavy version goes into the air, allowing him to cruelly punish bad jumpins. What really sets Akuma apart from the other shotos is his signature Demon Raid. Upon pressing this special, Akuma leaps into the air and can perform a series of followups. He has an overhead, a low, and a divekick, and each option can leave Akuma plus. If opponents try to parry through the followups, Akuma can always call this out by landing and throwing them for a Punish Counter Throw. Demon Raid is an incredible special for allowing Akuma to get his gameplan started, and the OD version even allows Akuma to throw a fireball and counter attempts to stuff his approach. While Demon Raid is strong, it can be easily anti-aired on reaction, requiring Akuma to be very considerate with where he unleashes it.
In the neutral, Akuma leverages his shoto normals of 2MK, 5HP and 5LP/5LK to control space. His fast walkspeed and strong pokes give him a dominating neutral presence. He also has some strong command normals for counterpoking, including the powerful 6MK snap kick and 6HP lunging punch. Once he's gotten you in the corner, Akuma excels at a diverse and threatening offense. He has many ways to be plus, including his 5MP and 5HK, though the latter can be ducked and punished. Akuma can use his new Adamant Flame special to set up shimmys and crush your opponent's Drive Gauge. Successful hits can be brutally effective, as Akuma's combo game is very strong with excellent juggle points OD special extensions. His devastating Empyrean's End Level 2 super leads to combo extensions, and his Level 3 is easy to combo into, allowing him to really pile on the damage. On top of all of this, Akuma also has an alternate CA called Shun Goku Satsu, a 0f comboable command grab that deals incredible damage when it connects. Truly, Akuma is the master of violence.
He's also the master of dying. Akuma's low vitality is a genuine concern in this game, as he has 9000 health compared to the standard 10,000. This might not seem like a lot, but it really is, as Akuma can be two-touched by most of the cast. While opponents may fear his rewarding and dominating offense, Akuma carries a ton of risk in basic play. Opponents who find a opening or make a specific read can punish Akuma harder than anyone else in the cast, especially if they have a Level 3 charged up. Akuma lives and dies by the mastery of the person playing him. If you can pilot him well, he will reward your efforts tenfold. If you like offense-oriented characters and can stay calm on the razor's edge, then embrace the demon with Akuma.
| Pick if you like: | Avoid if you dislike: |
|---|---|
|
|
Classic & Modern Versions Comparison
| Missing Normals |
|
|---|---|
| Missing Command Normals |
|
| Shortcut-Only Specials |
|
| Assist Combos |
|
| Miscellaneous Changes |
|
| Akuma | |
|---|---|
| Vitals | |
| Life Points | 9000 |
| Ground Movement | |
| Forward Walk Speed | 0.052 |
| Backward Walk Speed | 0.036 |
| Forward Dash Speed | 19 |
| Backward Dash Speed | 23 |
| Forward Dash Distance | 1.35 |
| Backward Dash Distance | 0.92 |
| Drive Rush Min. Distance (Throw) | 0.880 |
| Drive Rush Min. Distance (Block) | 2.112 |
| Drive Rush Max Distance | 3.425 |
| Jumping | |
| Jump Speed | 4+38+3 |
| Jump Apex | 2.115 |
| Forward Jump Distance | 1.90 |
| Backward Jump Distance | 1.52 |
| Throws | |
| Throw Range | 0.8 |
| Throw Hurtbox | 0.33 |
| Frame Data Glossary - SF6 | |
|---|---|
| Hitbox Images |
🟥 (Red): Attack hitbox
🟩 (Green): Vulnerable hurtbox that can be hit by strikes/projectiles
🟦 (Blue): Vulnerable throw hurtbox
|
| Active |
How many frames a move remains active (can hurt opponents) for. For projectiles with a maximum active period, a value may be listed in [brackets], but this number is not factored into the move's total frame count.
|
| Cancel |
Available options for canceling one move into another move.
|
| Cancel Hitconfirm Windows |
Hitconfirm reaction windows into Special Moves, Target Combos, and Super Arts.
|
| Damage |
Attack damage on hit. Multi-hit moves may have the damage listed for individual hits as X,Y (or sometimes X*Y). Sometimes a move's damage changes depending on which active frame connects, or on cinematic vs. non-cinematic hits; in this case, multiple values may be listed, and it will be clarified in the move description.
|
| Damage Scaling |
Some moves cause additional damage scaling in combos. Refer to Game Data page for a more detailed breakdown. Scaling Types:
|
| Drive Rush Cancel Advantage |
Refers to the frame advantage when canceling a normal, command normal, or Target Combo into Drive Rush on hit or block (abbreviated as DRC for Drive Rush Cancel). This is calculated at the moment a follow-up attack can be input, not at the moment the character can block or perform movement options. An attack that with DRC +8 on Hit can link into an 8-frame attack, and DRC +4 on Block can create a true blockstring into a 4-frame attack. Note that any DRC on Block worse than +4 cannot form a true blockstring, allowing the opponent to interrupt with an invincible reversal. Most light normals are slightly negative after a DRC on block, meaning the opponent can mash their fastest normal to guarantee a counter-hit (though this requires fast reactions). The attacking character could punish this with Light > DRC into an immediate invincible attack, but this would be an incredibly expensive and high-risk gambit.
|
| Forced Knockdown |
Most airborne command normals, special moves, and Super Arts put the user in a "Forced Knockdown" state. While in this state, an air knockdown will occur when being hit by any attack, even if it would otherwise cause an air reset. As an example, Ryu's 2HP causes an air reset when used as an anti-air. Against a move like Cammy's Hooligan Combination, however, the 2HP puts her into an air knockdown state. This allows Ryu to successfully cancel 2HP into Shoryuken for a juggle, similar to how a Drive Impact wall splat works. Taking advantage of Forced Knockdown juggles is important for dealing with moves like Ken's Dragonlash, Dhalsim's Air Teleport, or Kimberly's 6HK~Hop sequence. Moves that already cause an air knockdown, like most j.MP air-to-airs, will not display the "Forced Knockdown" message.
|
| Guard |
Refers to the direction an attack must be blocked. L is for Low attacks (must be blocked crouching), H is for High attacks/overheads (must be blocked standing), LH is for attacks that can be blocked crouching or standing. T is for Throw attacks which cannot be blocked.
|
| Juggles |
When a character is put into an Air Knockdown state, it is often possible to follow up with a Juggle attack before they hit the ground. In the simplest terms, there are 2 main juggle states:
The following is a more detailed overview of the SF6 juggle system:
Juggle Start (JS): When starting a juggle, the opponent's JC will be set to this value. May be different vs. standing and airborne opponents.
Juggle Increase (JI): When opponent is already in a juggle state, attacks will increase the opponent's JC by this amount.
Juggle Limit (JL): Property of an attack hitbox that determines whether it connects on a juggled opponent. The JL must be ≥ the opponent's JC to hit successfully.
An example to tie everything together:
Drive Rush notes:
|
| On Hit/Block |
These are frame advantage values when the attack hits or is blocked. If the number is positive, then the move will recover before the defender can act again. If the number is negative, the defender will be able to act before the attacker and maybe even punish. KD refers to knockdown on hit, and the listed KD Advantage refers to how many frames the attacker can act before the defender finishes their wakeup animation.
|
| Recovery |
How many frames it takes for a move to finish after the active frames have finished. For projectiles, recovery is considered to begin after the first active frame.
|
| Startup |
How many frames it takes before the move becomes 'active' or have a hit box. The last startup frame and the first active frame are the same frame, meaning all values are written as Startup + 1.
|
Normals
Standing Normals
5LP
| Startup | Active | Recovery | Cancel | Damage | Guard | On Hit | On Block |
|---|---|---|---|---|---|---|---|
| 4 | 3 | 7 | - | 300 | LH | +4 | -1 |
5MP
| Startup | Active | Recovery | Cancel | Damage | Guard | On Hit | On Block |
|---|---|---|---|---|---|---|---|
| 6 | 4 | 11 | - | 600 | LH | +4 | +1 |
5HP
| Startup | Active | Recovery | Cancel | Damage | Guard | On Hit | On Block |
|---|---|---|---|---|---|---|---|
| 9 | 5 | 18 | - | 800 | LH | +3 | -3 |
5LK
| Startup | Active | Recovery | Cancel | Damage | Guard | On Hit | On Block |
|---|---|---|---|---|---|---|---|
| 5 | 3 | 11 | - | 300 | LH | +2 | -4 |
5MK
| Startup | Active | Recovery | Cancel | Damage | Guard | On Hit | On Block |
|---|---|---|---|---|---|---|---|
| 7 | 5 | 15 | - | 700 | LH | +3 | -3 |
5HK
| Startup | Active | Recovery | Cancel | Damage | Guard | On Hit | On Block |
|---|---|---|---|---|---|---|---|
| 13 | 3(8)4 | 15(16) | - | 400x2 | LH | +7 | +3 |
Crouching Normals
2LP
| Startup | Active | Recovery | Cancel | Damage | Guard | On Hit | On Block |
|---|---|---|---|---|---|---|---|
| 4 | 2 | 9 | - | 300 | LH | +5 | -1 |
2MP
| Startup | Active | Recovery | Cancel | Damage | Guard | On Hit | On Block |
|---|---|---|---|---|---|---|---|
| 6 | 3 | 14 | - | 600 | LH | +6 | -1 |
2HP
| Startup | Active | Recovery | Cancel | Damage | Guard | On Hit | On Block |
|---|---|---|---|---|---|---|---|
| 8 | 8 | 19 | - | 900 | LH | 0 | -8 |
2LK
| Startup | Active | Recovery | Cancel | Damage | Guard | On Hit | On Block |
|---|---|---|---|---|---|---|---|
| 5 | 2 | 10 | - | 200 | L | +3 | -3 |
2MK
| Startup | Active | Recovery | Cancel | Damage | Guard | On Hit | On Block |
|---|---|---|---|---|---|---|---|
| 8 | 3 | 19 | - | 500 | L | +1 | -6 |
2HK
| Startup | Active | Recovery | Cancel | Damage | Guard | On Hit | On Block |
|---|---|---|---|---|---|---|---|
| 9 | 3 | 23(29) | - | 900 | L | KD +42 | -12 |
Jumping Normals
j.LP
| Startup | Active | Recovery | Cancel | Damage | Guard | On Hit | On Block |
|---|---|---|---|---|---|---|---|
| 4 | 10 | 3 land | - | 300 | H | ~+5(+10) | ~+1(+6) |
j.MP
| Startup | Active | Recovery | Cancel | Damage | Guard | On Hit | On Block |
|---|---|---|---|---|---|---|---|
| 8 | 4 | 3 land | - | 700 | H | ~+5(+10) | ~+5(+7) |
j.HP
| Startup | Active | Recovery | Cancel | Damage | Guard | On Hit | On Block |
|---|---|---|---|---|---|---|---|
| 9 | 6 | 3 land | - | 800 | H | ~+12(+14) | ~+8(+11) |
j.LK
| Startup | Active | Recovery | Cancel | Damage | Guard | On Hit | On Block |
|---|---|---|---|---|---|---|---|
| 6 | 10 | 3 land | - | 300 | H | ~+5(+10) | ~+1(+6) |
j.MK
| Startup | Active | Recovery | Cancel | Damage | Guard | On Hit | On Block |
|---|---|---|---|---|---|---|---|
| 7 | 6 | 3 land | - | 500 | H | ~+9(+13) | ~+5(+9) |
j.HK
| Startup | Active | Recovery | Cancel | Damage | Guard | On Hit | On Block |
|---|---|---|---|---|---|---|---|
| 12 | 6 | 3 land | - | 800 | H | ~+11(+15) | ~+8(+11) |
Command Normals
6MP
| Startup | Active | Recovery | Cancel | Damage | Guard | On Hit | On Block |
|---|---|---|---|---|---|---|---|
| 20 | 1,3 | 18 | - | 200+400 | H | +3 | -1 |
6MK
| Startup | Active | Recovery | Cancel | Damage | Guard | On Hit | On Block |
|---|---|---|---|---|---|---|---|
| 10 | 3 | 15 | - | 700 | LH | +5 | -4 |
4MK
No results
6HP
| Startup | Active | Recovery | Cancel | Damage | Guard | On Hit | On Block |
|---|---|---|---|---|---|---|---|
| 13 | 4 | 20 | - | 800 | LH | +4 | -3 |
4HP
No results
j.2MK
| Startup | Active | Recovery | Cancel | Damage | Guard | On Hit | On Block |
|---|---|---|---|---|---|---|---|
| 16 | 13 | 7 | - | 800 | - | - | - |
Target Combos
5MP~MP
| Startup | Active | Recovery | Cancel | Damage | Guard | On Hit | On Block |
|---|---|---|---|---|---|---|---|
| 7 | 3 | 21 | - | 1300 | LH | -1 | -6 |
4MK~HK
No results
6HP~HP~HK
No results
No results
Throws
Forward Throw (LPLK)
| Startup | Active | Recovery | Cancel | Damage | Guard | On Hit | On Block |
|---|---|---|---|---|---|---|---|
| 5 | 3 | 23 | - | 1200 (2040) | T | KD + 28 | - |
- Punish Counter: HKD +?
Back Throw (4LPLK)
| Startup | Active | Recovery | Cancel | Damage | Guard | On Hit | On Block |
|---|---|---|---|---|---|---|---|
| 5 | 3 | 23 | - | 1200 (2040) | T | KD + 14 | - |
- Side switches
- Punish Counter: HKD +?
Drive System
Drive Impact (HPHK)
| Startup | Active | Recovery | Cancel | Damage | Guard | On Hit | On Block |
|---|---|---|---|---|---|---|---|
| 26 | 2 | 35 | - | 800 | LH | KD +35 / Wall Splat KD +65 | -3 / Wall Splat HKD +72 |
- Armor (2-hit): 1-27f
- Applies 20% damage scaling to next hit when beginning a combo (including Wall Splat on block)
- Combos when canceled from -- (no corner wallsplat)
- Useful for draining opponent's Drive gauge, especially after Perfect Parry
See Drive Impact on the Gauges page for more details.
When canceled from a normal, these are the important blockstring gaps; a gap of N will trade with an N-frame startup attack; [] = Burnout
- -
- Note: A gap ≥ 6f can be thrown, and a gap ≥ 9f can be jumped out of by most characters
Against the following characters in Burnout:
- JP (22K), frame 3 counter
- Marisa (214K), frame 3 armor
- Zangief (5[HP]), frame 4 armor
It's important to use a blockstring that cannot be absorbed by their armor/counter moves. Ideally, the string should also not be a true combo, or it will cause a Lock and prevent Stun. Note that if the opponent mashes buttons on wakeup, the counter-hit will cause DI to Lock.
Drive Reversal (6HPHK)
| Startup | Active | Recovery | Cancel | Damage | Guard | On Hit | On Block |
|---|---|---|---|---|---|---|---|
| 20(18) | 3 | 26 | - | 500 recoverable | LH | KD +23 | -6 |
- Full Invuln: 1-22f; Armor Break
- 5f extra recovery on hit
See Drive Reversal on the Gauges page for more details.
Drive Parry (MPMK)
| Startup | Active | Recovery | Cancel | Damage | Guard | On Hit | On Block |
|---|---|---|---|---|---|---|---|
| 1 | 12 or until released | 33(1)(11) | - | - | - | - | - |
See Drive Parry on the Gauges page for more details.
- Perfect Parry:
- Applies a 50% damage scaling multiplier to any punish afterwards
- vs. strikes, has only 1f recovery and prevents the opponent from canceling their attack
- vs. projectiles, puts you into a fixed 11f recovery
Drive Rush (66)
| Startup | Active | Recovery | Cancel | Damage | Guard | On Hit | On Block |
|---|---|---|---|---|---|---|---|
| 9(11) | 45(46) | 24(23) | - | - | - | - | - |
- Applies 15% damage scaling multiplier to any follow-up hits when used mid-combo
- Only applies scaling once per combo; does not apply when an enhanced Drive Rush attack starts the combo
See Drive Rush on the Gauges page for more details. Frame data shown in (parentheses) refers to Parry Drive Rush.
- Distance:
- ? (min, cancel into immediate Throw)
- ? (min, earliest blocking/movement frame)
- ? (max, final DR frame)
- See Strategy page for Blockstring Gaps and Combo Routes
Special Moves
Gou Hadoken (236P)
| Startup | Active | Recovery | Cancel | Damage | Guard | On Hit | On Block |
|---|---|---|---|---|---|---|---|
| 16 | - | 30 | - | 700 | LH | 0 | -4 |
| Startup | Active | Recovery | Cancel | Damage | Guard | On Hit | On Block |
|---|---|---|---|---|---|---|---|
| 14 | - | 32 | - | 700 | LH | -2 | -6 |
| Startup | Active | Recovery | Cancel | Damage | Guard | On Hit | On Block |
|---|---|---|---|---|---|---|---|
| 12 | - | 34 | - | 700 | LH | -4 | -8 |
| Startup | Active | Recovery | Cancel | Damage | Guard | On Hit | On Block |
|---|---|---|---|---|---|---|---|
| 12 | - | 29 | - | 400+600 | LH | KD +55 | +2 |
Gou Hadoken (Partial Charge) (236{P})
| Startup | Active | Recovery | Cancel | Damage | Guard | On Hit | On Block |
|---|---|---|---|---|---|---|---|
| 30-54 | - | 29 | - | 400+600 | LH | KD +55 | +2 |
| Startup | Active | Recovery | Cancel | Damage | Guard | On Hit | On Block |
|---|---|---|---|---|---|---|---|
| 30-54 | - | 29 | - | 400+600 | LH | KD +55 | +2 |
| Startup | Active | Recovery | Cancel | Damage | Guard | On Hit | On Block |
|---|---|---|---|---|---|---|---|
| 31-55 | - | 29 | - | - | LH | KD +55 | +2 |
| Startup | Active | Recovery | Cancel | Damage | Guard | On Hit | On Block |
|---|---|---|---|---|---|---|---|
| 23-31 | - | 29 | - | 400+600 | LH | KD +57 | +2 |
Gou Hadoken (Charged) (236[P])
| Startup | Active | Recovery | Cancel | Damage | Guard | On Hit | On Block |
|---|---|---|---|---|---|---|---|
| 56 | - | 28 | - | 600x2 | LH | KD +57 | +5 |
| Startup | Active | Recovery | Cancel | Damage | Guard | On Hit | On Block |
|---|---|---|---|---|---|---|---|
| 56 | - | 28 | - | 600x2 | LH | KD +57 | +5 |
| Startup | Active | Recovery | Cancel | Damage | Guard | On Hit | On Block |
|---|---|---|---|---|---|---|---|
| - | - | - | - | 600x2 | LH | KD +57 | +5 |
| Startup | Active | Recovery | Cancel | Damage | Guard | On Hit | On Block |
|---|---|---|---|---|---|---|---|
| 31 | - | 28 | - | 600x2 | LH | KD +57 | +5 |
Zanku Hadoken (j.236P)
| Startup | Active | Recovery | Cancel | Damage | Guard | On Hit | On Block |
|---|---|---|---|---|---|---|---|
| 13 | - | ? land | - | 600 | LH | - | - |
| Startup | Active | Recovery | Cancel | Damage | Guard | On Hit | On Block |
|---|---|---|---|---|---|---|---|
| 6 | - | ? land | - | 300x3 | LH | - | - |
Gou Shoryuken (623P)
| Startup | Active | Recovery | Cancel | Damage | Guard | On Hit | On Block |
|---|---|---|---|---|---|---|---|
| 5 | 10 | 33 | - | 1100 | LH | KD +38 | -22(-23) |
| Startup | Active | Recovery | Cancel | Damage | Guard | On Hit | On Block |
|---|---|---|---|---|---|---|---|
| 6 | 10 | 42 | - | 700,600 (1300) | LH | KD +38 | -30 |
| Startup | Active | Recovery | Cancel | Damage | Guard | On Hit | On Block |
|---|---|---|---|---|---|---|---|
| 7 | 11 | 50 | - | 600,500,400 (1500) | LH | KD +30 | -36 |
| Startup | Active | Recovery | Cancel | Damage | Guard | On Hit | On Block |
|---|---|---|---|---|---|---|---|
| 6 | 11 | 52(5) | - | 300x3,100,900(1900) | LH | KD +14 | -39(-41) |
Tatsumaki Zanku-Kyaku (214K)
| Startup | Active | Recovery | Cancel | Damage | Guard | On Hit | On Block |
|---|---|---|---|---|---|---|---|
| 12 | 2 | 21 | - | 600 | LH | KD +50 | -13 |
| Startup | Active | Recovery | Cancel | Damage | Guard | On Hit | On Block |
|---|---|---|---|---|---|---|---|
| 11 | - | - | - | 500x2 (1000) | LH | KD +41 | -13 |
| Startup | Active | Recovery | Cancel | Damage | Guard | On Hit | On Block |
|---|---|---|---|---|---|---|---|
| 7 | - | - | - | 400,300x2,600 (1600) | LH | KD +34 | -59 |
| Startup | Active | Recovery | Cancel | Damage | Guard | On Hit | On Block |
|---|---|---|---|---|---|---|---|
| 13 | - | - | - | 200x3,100,300 (1000) | LH | - | - |
Aerial Tatsumaki Zanku-Kyaku (j.214K)
| Startup | Active | Recovery | Cancel | Damage | Guard | On Hit | On Block |
|---|---|---|---|---|---|---|---|
| 11 | - | - | - | - | - | - | - |
| Startup | Active | Recovery | Cancel | Damage | Guard | On Hit | On Block |
|---|---|---|---|---|---|---|---|
| 11 | - | - | - | - | - | - | - |
Adamant Flame (214P)
| Startup | Active | Recovery | Cancel | Damage | Guard | On Hit | On Block |
|---|---|---|---|---|---|---|---|
| 15 | 3 | 23 | - | 700 | - | +1(+2) | -8 |
| Startup | Active | Recovery | Cancel | Damage | Guard | On Hit | On Block |
|---|---|---|---|---|---|---|---|
| 19 | 3 | 20 | - | 800 | - | +2(+3) | -4 |
| Startup | Active | Recovery | Cancel | Damage | Guard | On Hit | On Block |
|---|---|---|---|---|---|---|---|
| 23 | 3 | 19 | - | 900 | - | +3 | -2 |
| Startup | Active | Recovery | Cancel | Damage | Guard | On Hit | On Block |
|---|---|---|---|---|---|---|---|
| 18 | 3 | 23 | - | 700 | - | +1 | -3 |
Demon Raid (236K)
| Startup | Active | Recovery | Cancel | Damage | Guard | On Hit | On Block |
|---|---|---|---|---|---|---|---|
| - | - | - | - | - | - | - | - |
| Startup | Active | Recovery | Cancel | Damage | Guard | On Hit | On Block |
|---|---|---|---|---|---|---|---|
| - | - | - | - | - | - | - | - |
(slide) (236K~No Input)
| Startup | Active | Recovery | Cancel | Damage | Guard | On Hit | On Block |
|---|---|---|---|---|---|---|---|
| - | - | - | - | 1000 | L | KD +39 | +2 |
| Startup | Active | Recovery | Cancel | Damage | Guard | On Hit | On Block |
|---|---|---|---|---|---|---|---|
| - | - | - | - | 1000 | L | KD +39 | +2 |
(overhead) (236K~P)
| Startup | Active | Recovery | Cancel | Damage | Guard | On Hit | On Block |
|---|---|---|---|---|---|---|---|
| - | - | - | - | 1300 | H | - | +4(+7) |
| Startup | Active | Recovery | Cancel | Damage | Guard | On Hit | On Block |
|---|---|---|---|---|---|---|---|
| - | - | - | - | - | H | - | - |
(divekick) (236K~K)
| Startup | Active | Recovery | Cancel | Damage | Guard | On Hit | On Block |
|---|---|---|---|---|---|---|---|
| - | - | - | - | - | LH | - | - |
| Startup | Active | Recovery | Cancel | Damage | Guard | On Hit | On Block |
|---|---|---|---|---|---|---|---|
| - | - | - | - | - | LH | - | - |
(feint) (236K~?)
| Startup | Active | Recovery | Cancel | Damage | Guard | On Hit | On Block |
|---|---|---|---|---|---|---|---|
| 45 | - | - | - | - | - | - | - |
| Startup | Active | Recovery | Cancel | Damage | Guard | On Hit | On Block |
|---|---|---|---|---|---|---|---|
| 45 | - | - | - | - | - | - | - |
(air fireball) (236KK~j.236P)
| Startup | Active | Recovery | Cancel | Damage | Guard | On Hit | On Block |
|---|---|---|---|---|---|---|---|
| - | - | - | - | 300x3 (900) | LH | - | - |
(air tatsu) (236KK~j.214K)
| Startup | Active | Recovery | Cancel | Damage | Guard | On Hit | On Block |
|---|---|---|---|---|---|---|---|
| - | - | - | - | - | - | - | - |
Ashura Senku (6PPP or 4PPP)
No results
No results
Oboro Throw (6PPP~LPLK)
No results
Super Arts
Level 1 Super (236236P)
| Startup | Active | Recovery | Cancel | Damage | Guard | On Hit | On Block |
|---|---|---|---|---|---|---|---|
| 10 | - | - | - | 2200 | LH | KD +9 | -41 |
Level 1 Super (j.236236K)
| Startup | Active | Recovery | Cancel | Damage | Guard | On Hit | On Block |
|---|---|---|---|---|---|---|---|
| 14 | - | - | - | - | LH | - | - |
Level 2 Super (214214P)
| Startup | Active | Recovery | Cancel | Damage | Guard | On Hit | On Block |
|---|---|---|---|---|---|---|---|
| 9 | - | - | - | 2800 | LH | HKD +29 (HKD +97 Wallsplat) | -35 |
Level 3 Super (236236K)
| Startup | Active | Recovery | Cancel | Damage | Guard | On Hit | On Block |
|---|---|---|---|---|---|---|---|
| 8(2) | - | - | - | 4000 | LH | HKD +18 | -41 |
| Startup | Active | Recovery | Cancel | Damage | Guard | On Hit | On Block |
|---|---|---|---|---|---|---|---|
| 8(2) | - | - | - | 4500 | LH | HKD +18 | -41 |
Shun Goku Satsu (LP~LP~6LK~HP)
| Startup | Active | Recovery | Cancel | Damage | Guard | On Hit | On Block |
|---|---|---|---|---|---|---|---|
| ?+0 | - | - | - | 4700 | T | - | - |
Taunts
Neutral Taunt (5PPPKKK)
| Startup | Active | Recovery | Cancel | Damage | Guard | On Hit | On Block |
|---|---|---|---|---|---|---|---|
| 433 (total) | - | - | - | - | - | - | - |
Forward Taunt (6PPPKKK)
| Startup | Active | Recovery | Cancel | Damage | Guard | On Hit | On Block |
|---|---|---|---|---|---|---|---|
| 570 (total) | - | - | - | - | - | - | - |
Back Taunt (4PPPKKK)
| Startup | Active | Recovery | Cancel | Damage | Guard | On Hit | On Block |
|---|---|---|---|---|---|---|---|
| 765 (total) | - | - | - | - | - | - | - |


